Jeff Patton, Mental Ray guru extraordinaire (and one of the most helpful people I've ever run into) has a terrific tutorial on preparing trees to render in Mental Ray. Read it here:
http://www.mrmaterials.com/jeffs-blog/103-faster-foliage-renders.html
Following these steps you'll get some beautiful renders of your trees quickly. This is because Jeff advocates turning off the cutout map and controlling the diffuse color for final gather calculation, locking the final gather map and rendering with the cutout map turned back on.
I think that this is a reasonable process but as the number of plant types go up, the process of disabling the cutout map, generating final gather then re-enabling the cutout map becomes a bit laborious (IMHO) and if you're in a rush (which who isn't by time to render?) its easy to forget to enable a map or two. So let me show you what I like to do which might be a bit more time consuming on the front end but (I believe) will save you an "oh, crap!" moment on the back end.
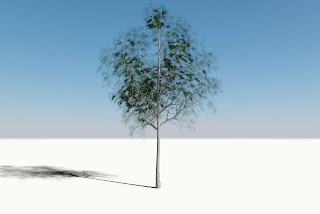
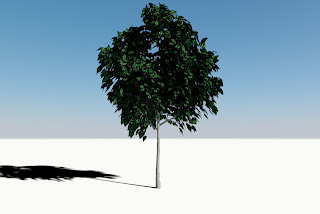
I've started out with an xfrog pecan tree (young). I don't have the rights to distribute the model but you can get it from the Autodesk site mentioned in Jeff's post. Initially, render time is terrible. I had a couple of quad cores working the job, it took 9m 11s and the resulting image looks like this:

We're getting killed on render time because of the cutout maps. Mental Ray, V-Ray, they all hate them. Disabling the cutout map drops my render time to 0m 39s!

Obviously, this doesn't look too good either. However, we can see that we need to do something about the cutout maps because they are having a dramatic effect on render time. The reason the cutout maps are soooo slow is because of the bitmap blurring. As maps get farther from the camera, or the viewing angle becomes more acute max will blur bitmaps to help reduce aliasing effects. Blurring a bitmap that is used to control opacity wreaks havoc for the renderer.
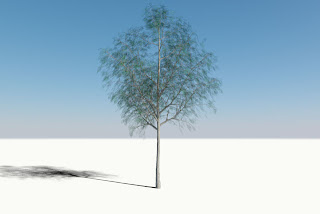
 Go into your material editor, select your cutout map, and set the blur value as low as it can go (right click on the spinner and max will set it to the lowest possible value), hit render, and you'll get something like this (which rendered in 3m 24s)
better? maybe not. We've got some other problems that we need to deal with. First of all, in an xfrog plant the diffuse, and opacity maps are linked and our diffuse map no longer benefits from the bitmap blurring. Its tough to see in this example, but you'll end up with a highly aliased diffuse texture We need to de-instance the diffuse and cut out maps and set bitmap blurring to 1.0 on the diffuse map. Which gives us this:

Now we're getting dark ringing around all of our leaves. This is because of the the unblurred cutout map doesn't line up exactly with the blurred diffuse map. In addition, final gather takes the bitmap background color into account when generating the bounced light. In this particular map, that color is black. So we aren't really even benefiting from the final gather bounces.
Its time to make some new textures. This is really a piece of cake.
Open your diffuse texture in Photoshop.
- Take a color sample from one of the leaves.
- Create a new background layer and fill it with the color value.
- Flatten the image.
- Check to make sure there is no alpha channel (in the diffuse slot it does you no good and it just takes up space on disk and in memory)
- Save as a tif, I'll typically use the original name with "_MR" added to it (don't use LZW compression, Mental Ray doesn't like it).
I like to make note of the RGB value that I used for my background layer and then use that in the diffuse color slot. It won't affect final gather but it will make your leaves green in the viewport (and it kind of looks prettier that way).
At this point, I figure its worth making a new cutout map as one we are using currently has RGB plus alpha data in it and all we need is the alpha info. The red, green, blue channels just represent additional space on disk and in memory.
- Open your cutout map in Photoshop.
- Create a new background layer and fill it with pure black
- Select your leaf layer and fill it with white
- Flatten your image Convert to grayscale
- Save as a tif, I'll name it with the original file name with "_MR_Cutout" added to it.
It seems silly to ignore the bump map, we can easily make a more effective map and again, the file we are currently using has more image data than we need.
 - Open your bump map in photoshop
 - Create a new background layer and fill it with pure black.
- Select the leaf layer and open channel mixer.
Check "Monochrome"
- Play around with the sliders until you feel like you've emphasized the ridges in the leaf. (I feel like you want to increase the use of the green channel and reduce the use of the red and blue channels)
- You might want to tweak the brightness/contrast.
- Flatten the image Convert to grayscale
- Save as a tif, I'll name it with the original file name with "_MR_Bump" added to it.
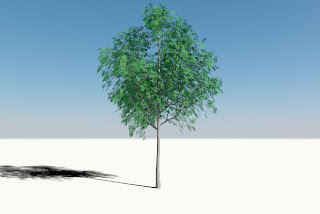
Of course, you'll need to relink these textures to Max. Now hit render and see what you get...(I think you'll like it!)

Much, much better! Render time: 1m 5s!
I attribute the speed increases first off all to bitmap blurring but also to feeding MR smaller maps which only contain the image data it needs.
I think this process that I have presented seems time consuming, it really isn't. You can get one of these trees spiffed up and ready to go in about 5 minutes. If you create some photoshop actions, I think you could probably do it even quicker.
Undeniably the tree looks much better and renders much faster. This tutorial is geared towards Mental Ray but these tweaks work just as well for V-Ray.
I've got a few more tips up my sleeve which address adding some variation to the leaf color and the geometry itself. Stay tuned.
yes
ReplyDeleteI have also found that using geo leaves renders the fastest
ReplyDeletelook into arbaro trees and doing trees with onyz as well arbaro is free by the way has saved me tons of time as well .
ReplyDelete